Here's a 1/144 HGUC kit that was completed in June 2012. As usual, I have minimized my efforts to paint the whole model; basically, I will only apply a flat coat over the bare plastic. Before applying the flat coat, I have introduced a few photo-etched parts and decals. Most of my decals were from Bandai's 1/144 0079 water slide decal set. Additional caution decals were taken from Samuel Decals 1/144 Caution decal sheet. Panel lines were applied before the flat coat and the weathering was only applied after the flat coat.
Here's the link to the full 1/144 RX-75 album
Showing posts with label 1/144. Show all posts
Showing posts with label 1/144. Show all posts
Saturday, June 30, 2012
Sunday, May 15, 2011
RX-77-3 Guncannon (Completed!)

Finally, completed this model. I must say this is an easy build. The parts are molded according to the original mobile suit color scheme. The rest of the photos are located here
The only problem with older HGUC kits are the seem-lines although I can see that Bandai has invested some effort to hide some of the seem-lines. Some of the parts like the head, the feet still requires some sanding. For the head, I find it too much an effort to hide the seem-lines and decided not to do anything to it.
Saturday, May 14, 2011
WIP: Decals applied on all possible parts

Decals applied and part are now ready for a matt coat treatment. I encountered a slight problem when apply the round decal at the ankles. As the surface was curved, the decals could not set snugly onto the surface. Fortunately, with the help of "Mr. Decal Softener", the decals finally blended with the curved surface.
Friday, May 13, 2011
WIP: HGUC 1/144 RX-77-2 Guncannon

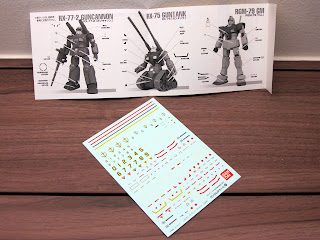
Started with the RX-77-2 Guncannon kit in order to continue with the use of the 1/144 Bandai decals; leftover from my last project with the HGUC GM. Decals were applied according to the instructions that came with the decal. In addition, the reference were made from Master Grade version instructions manual obtained from the web.
Friday, April 8, 2011
Fully armed. Ready to strike!

Not much progress from modelling but I managed to some time to unbox my 1/144 Full-Armor Unicorn Gundam (Gundam Fix Figuration). I must say the materials used on this kit is more "playable" (though that's not what it was inteneded for); I feel that is of better quality than the initial GFF kits which tends to have parts having difficulty attaching to each other. For example, the additional booster feels like quality plastic was being used and the detailing on the booster was really nice.
Some of the complains I have about this kit includes the misaligned V-fin. It wasn't attached symmetrically to the head; I have to adjust the fin with some tools to get it to the rigt position. The other issue I have with the kit are the double gattling guns attached to the shields; they are not really tight and I pinch a little bit of blue-tac in order to keep the parts in place.
Overall, this is still a nice kit. I think it's time now to work on my 1/144 Unicorn Gundams to pair up with this monster.
Sunday, February 27, 2011
RGM-79 'GM' assembled!
Ah.. finally completed this kit. I was having a little struggle with my work schedule and finding some time to work on this. Here's the final product; water-slide decal applied, matt coat the kit and finally, included detail paint on small parts from the kit (eg. hydraulics at the ankle)
More photos can be found here
Monday, February 7, 2011
WIP: RGM-79 GM Decal
RGM-79 Scribing Work
Sunday, February 6, 2011
WIP: HGUC RGM-79 GM

Consider this my first Gundam project for the year 2011. In this photo, the parts have already been sanded, flashes removed, additional panel line added and part has all been panel lined. This is my first project which I have tried scribing my own panel lines on a kit. It can be challenging if now proper tool is used. In my case, I have used Tamiya's plastic scribing tool. Next step: 1. apply decal -> 2. apply flat coat -> assemble
Sunday, December 5, 2010
Sunday, October 24, 2010
HGUC Zaku II F2 EFSF
HGUC Zaku II F2 EFSF WIP (Part 4)
Monday, October 18, 2010
HGUC Zaku II F2 EFSF WIP (Part 3)
Sunday, October 17, 2010
HGUC Zaku II F2 EFSF WIP (Part 2)
Tuesday, October 5, 2010
Current Project: HGUC Zaku II F2 EFSF WIP (Part 1)
I'm currently working slowly on the HGUC Zaku II F2 EFSF. The scope of this project is limited to:
1. Minimal Painting but apply little details when necessary
2. Application of water slide decal (I bought my decal, GD-79 from Hobby Link Japan)
3. Matt coat after decal application
4. Dry brush some parts when necessary
I have just completed the body...


1. Minimal Painting but apply little details when necessary
2. Application of water slide decal (I bought my decal, GD-79 from Hobby Link Japan)
3. Matt coat after decal application
4. Dry brush some parts when necessary
I have just completed the body...


Saturday, June 5, 2010
GFF Gundam Exia
Sunday, May 2, 2010
Gundam Astray - Red Frame (HG 1/144)
Subscribe to:
Posts (Atom)


